Scrapbook, Tulip Thoughts

OllieTulipThoughts1

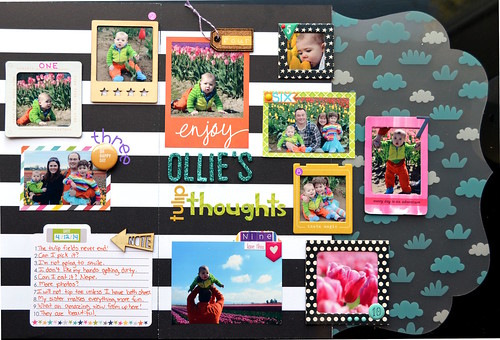
Oh I've got a fun layout here!  I really wanted to try Scrap Our Stash's word challenge.  I had a great idea in my head that started as a single layout that changed two a double layout that ended up being a page and a half layout!  I used one of Bella Blvd's new Invisibles.  I really liked how it is fairly thick.  Much more sturdy than a transparency.  It really is going to add a cool layer to my little dude's scrapbook. So here is what I used for the challenge:
 
S-Stickers
T-Twine and Thickers
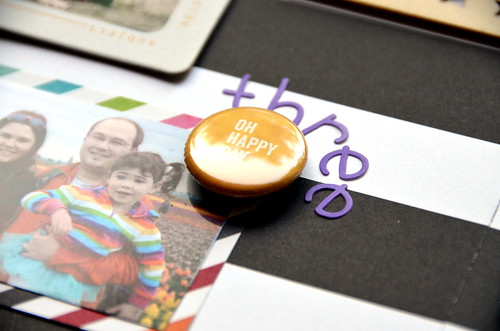
E-Enamel Dots
N-Numbers
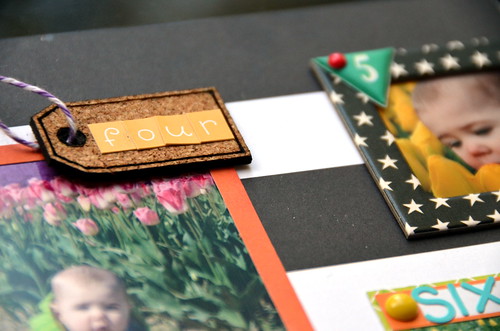
C-Cork and Color
I-"Invisable"
L-Labels
 
When I started this layout is had eight photos on a 12x12, but it didn't leave me enough room for a title and journaling so I added another page.
 
OllieTulipThoughts2
 
The two pages gave me too much space so I thought I'll just make it a half a page and only add a few extra photos.  Now I don't have any half page page protectors around.  I ended up cutting up one of my 12x12 in half and sewing the side up.  Then I sewed the half onto the another 12x12 so I could get a seamless look when they are open and not have a gap.  It worked surprisingly well.  Now I know there are some seamless double page layout page protectors out there, but I'm not aware of any one and a half ones.
 
OllieTulipThoughts3
 
The numbers on my layout guide you to the number journaling.
 
OllieTulipThoughts4
 
It was a good way to use up all those numbers I have!
 
 
And a process video to finish it off!

Comments

  1. Love the double page concept and all of your detail and little bits. Great way to use up your stash. Thanks for joining in with us at Scrap Our Stash!

    ReplyDelete
  2. WOW! This is so creative! Thank you for playing along with us at Scrap Our Stash!

    ReplyDelete
  3. Lots and lots of fun elements! This is very creative! Thanks for joining us at Scrap Our Stash!!

    ReplyDelete
  4. Wow! Great page and so much details! Thanks for playing along with us at Scrap Our Stash!

    ReplyDelete
  5. Pretty layout! Thanks for joining the Scrap Our Stash Challenge!

    ~Robin Redd
    Scrap Our Stash Design Team

    ReplyDelete
  6. Mom is not the only one who checks out your page. ;)

    ReplyDelete
  7. Great job - love how you incorporated so many photos! Thanks for joining us at Scrap Our Stash!

    ReplyDelete
  8. awesome layout! Thanks for playing along with Scrap our Stash!

    ReplyDelete

Post a Comment

Popular posts from this blog

Fish Finger Glove Puppet

I just love being back east and being with all of my family for Christmas, but I don't like the travel and I really don't like the germs.  We managed to bring back with us some lovely east coast germs.  Little Moose took it the hardest and still is a little bit sick.  Anyways, I finally got the chance to get back onto my computer and I just have to share with you what my sister-in-law made for us.  There are a bunch so I'll share one every day this week! I love the bright colors of the fishes!  Each glove puppet came with a poem.  They are just to cute!

Valentine's Day Wreath

Now that the Christmas decorations are down, it is time to make some Valentine's Day decorations to put up! I have seen some in the store, but it is much more fun to make your own.  So here is how I made my sweet heart wreath. First you need a hoop (the one I used had about a 7 in diameter), 7 big wooden hearts, 8 small wooden hearts, paint, glitter, ribbon, and some hot glue. I took all my hearts and painted them a solid color and then went back over them and made some patterns or outlined them. I thought they were looking a little boring so I went back and put some glitter on random ones. Then I went around and hot glued the big ones and tried to make them as evenly spaced as possible. Then I hot glued the smaller ones on top of the bigger hearts, tied some ribbon, and then hung on my door!

Scrapbooking, Adore

    Every once in a while, I make a layout that I absolutely love and this is one of them.  I think it might be the rainbowness of it all that I love.  This is really a random photo of my daughter that I took while we were waiting for the bus.  I played with the photo on my phone and made it more rainbowy.  I really like how it came out, so I printed it out for my project life, but then I decided it needed its own page.  It really is a random page for a random photo.     This is my page for the Memory Nest . The circles on the sketch were my major inspiration.  I felt that they would make a fun background.  At first, I changed the circles to triangles and then I noticed all these old frames on my desk.  I'm a chipboard frame hoarder. lol.  I thought most of the frames were really ugly or they had patterns that I would never use.  At first, I was going to just paint the frames white, but then I decided to make them gray.  I'm glad I made them gray because now they